Cart is empty.
Flow-Through Worm Tower
Traditional worm bins are great to get "black gold" or worms castings left behind from our worms. Red wigglers (composting worms) head to the surface to feed. This means that they are always close to the top and required removing them to get to the "black gold" at the bottom.
The flow through method is simply illustrated to the right. The worm castings are always at the bottom, you just need to add about a foot of some newspaper, damp cardboard, peat moss in the bin. Then toss them old food scraps on the top about once a week. THe worms will then eat and break everything down over the next 3 months.
This is usually the time you'd take the top layer of castings off, sort out the worms, scoop the black gold, make sure there aren't many worms in it and replace you worms in a new bin to repeat the cycle.
The flow through method is way simpler, just add more newspaper, damp cardboard, peat moss to the top. Scrape the bottom to get the worm castings and continue feeding.
You now have less worms in your castings (remember, they like to go up to feed), you don't need to do any messy scooping and sorting, and your worms are happier because they had very minimal disturbance.

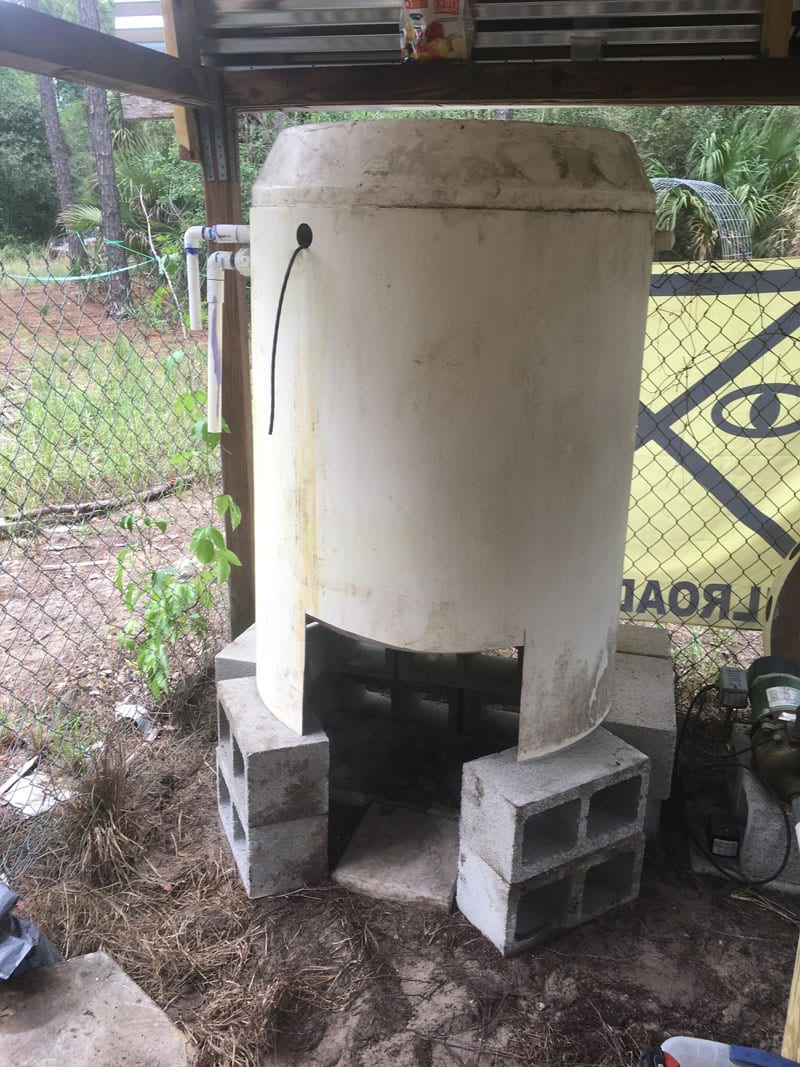
We found this old well water aeration tank that was used to remove the sulfur smell from the water. A perfect start to a tower, you can up-cycle anything in this shape to make yours. A trash can, a plastic drum, etc.
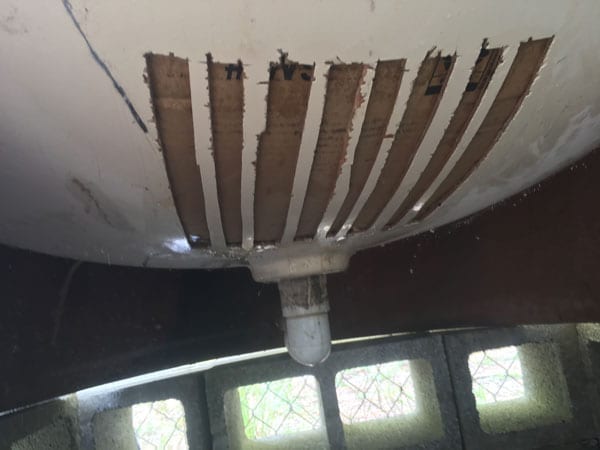
I flipped it upside down and cut a piece out in order to have access to the bottom of the cylinder. I have a Milwaukee HACKZALL which is one of my all time favorite tools. I use it for cutting wood, chopping trees, pruning and a hundred other construction things. But you could you a handsaw for the cutting, I put a link below to a hand saw I like.
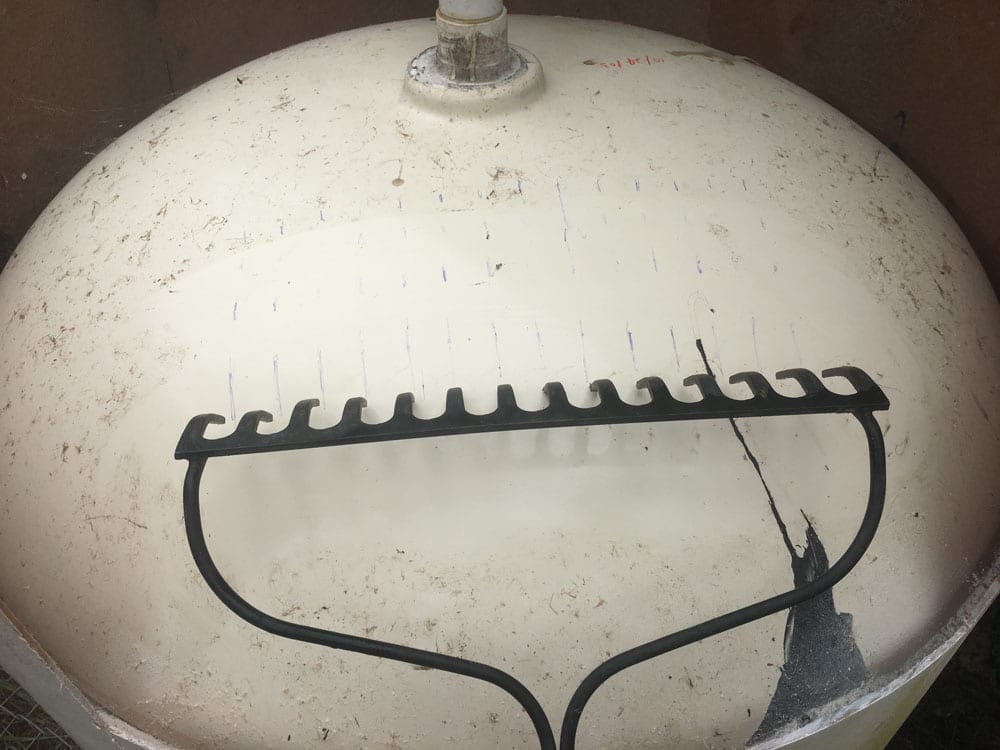
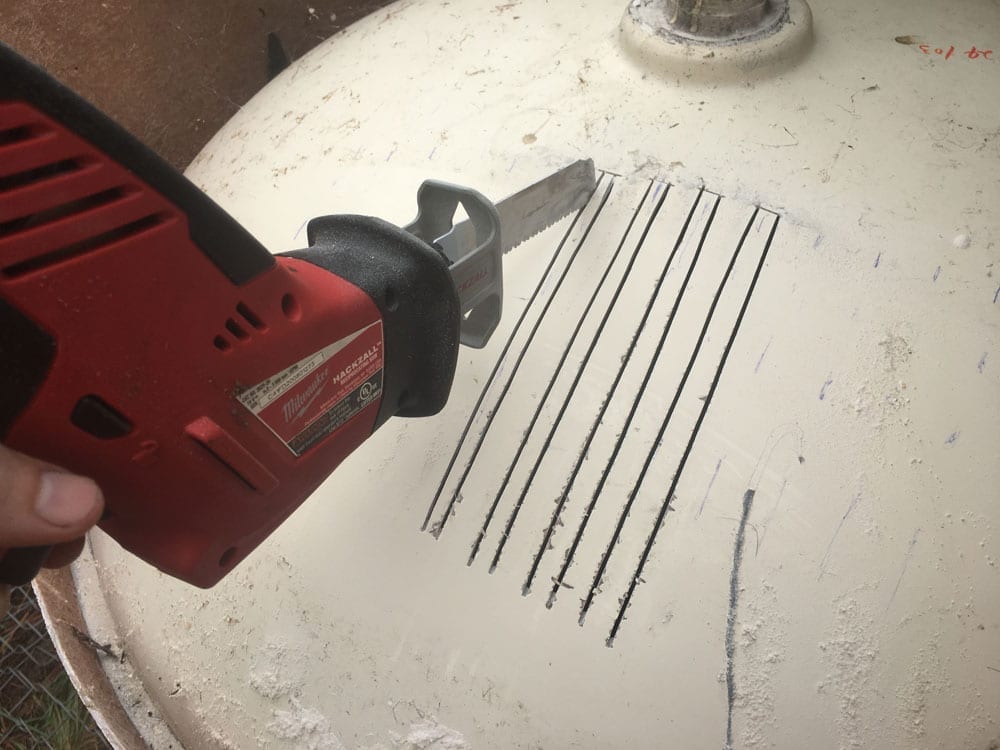

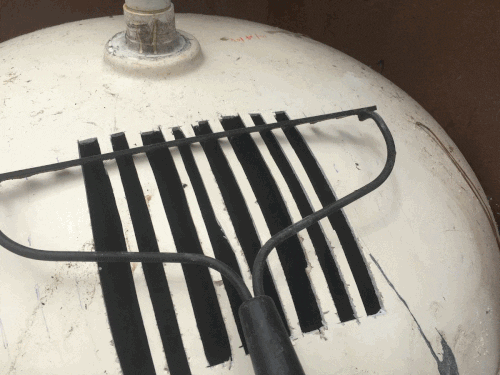
I got my rake and marked where it will be use to scrape the bottom of the barrel, then I cut the slits in it. After some trial and error I was able to slide the rake the length of the slits. I also cut the 3 end prongs off of the rake on the left and right side.
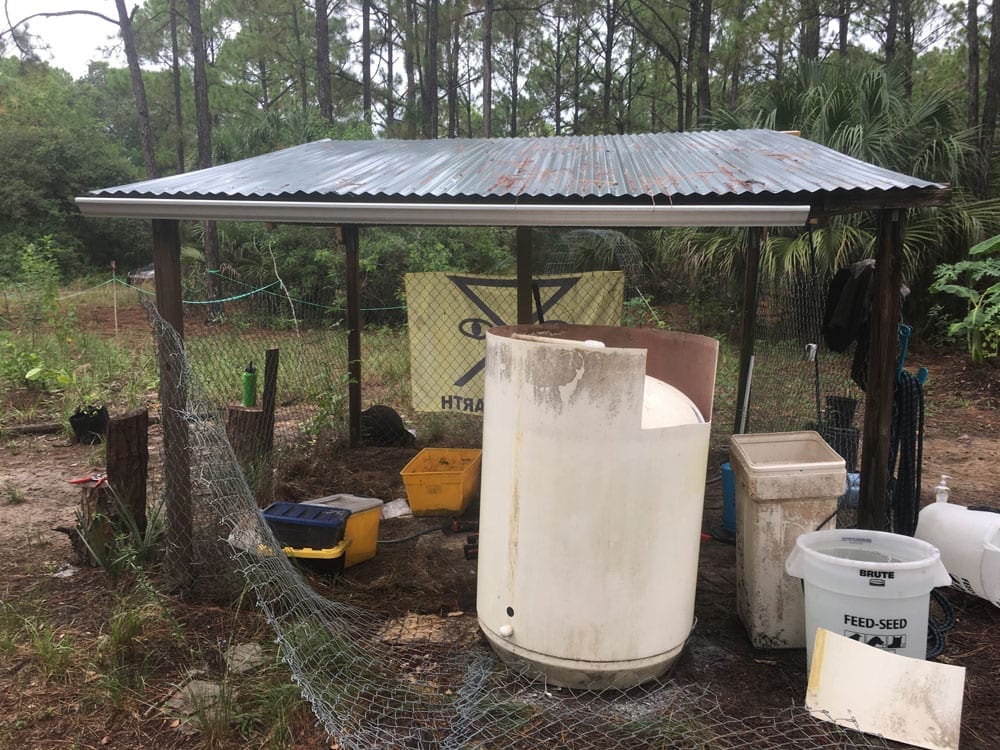
I leveled out the ground to build the foundation where the tower will live. I stacked up cement bricks to raise it up so that I can scrape the bottom easily.
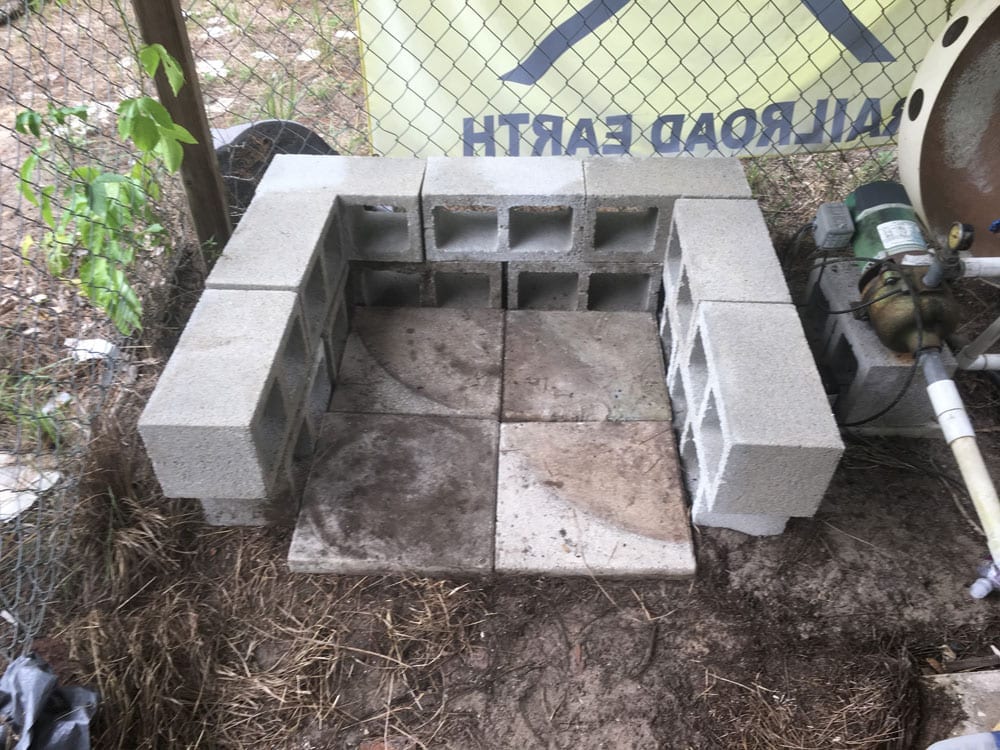
I lifted the tank up and on the raised foundation. I moved the front bricks around in order to give the maximum surface-to-surafce contact with the tank and allow the most support.
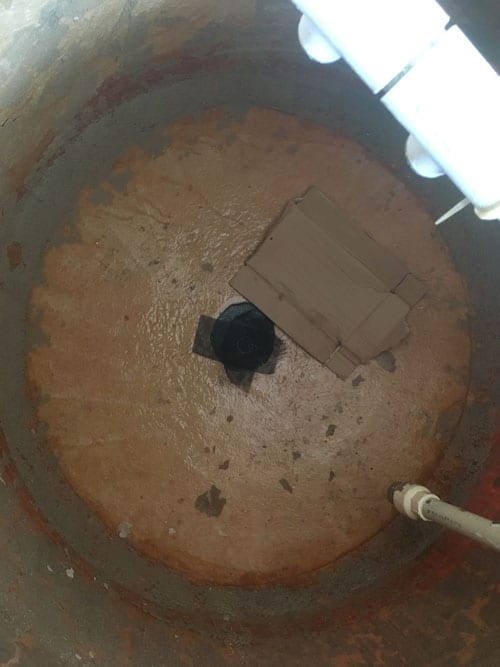
Next I made some stairs up to the tower so I can see in it. I put a couple screens over the bottom drain and cardboard over the grate. Then I filled it up about a food with some sand, peatmoss, damp cardboard and pine needles. I added the worms on top and then threw some food scraps on them, a few banana peels and other veggies.
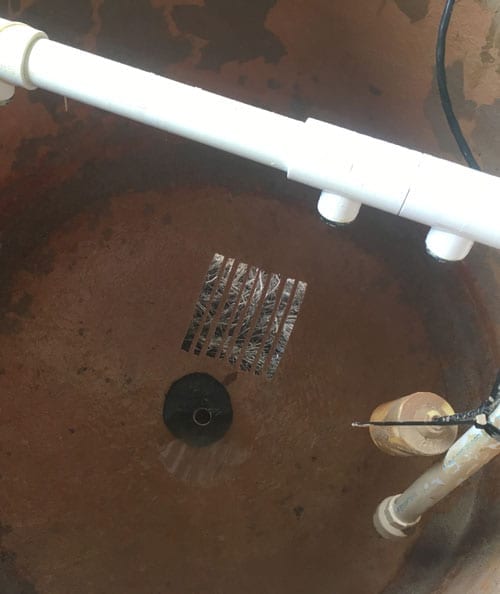
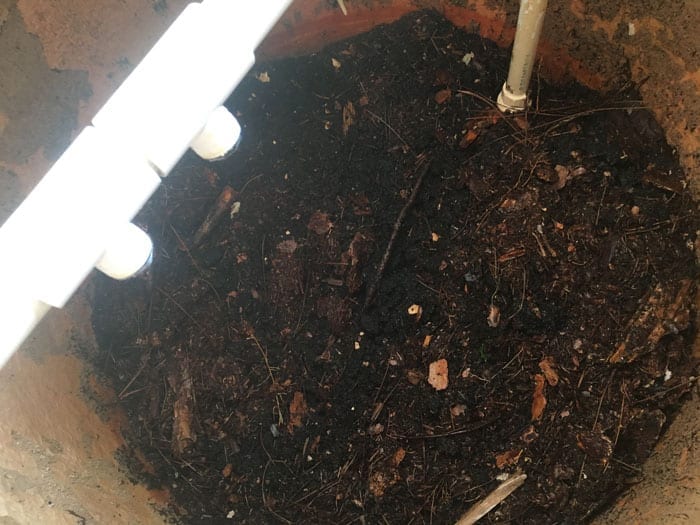
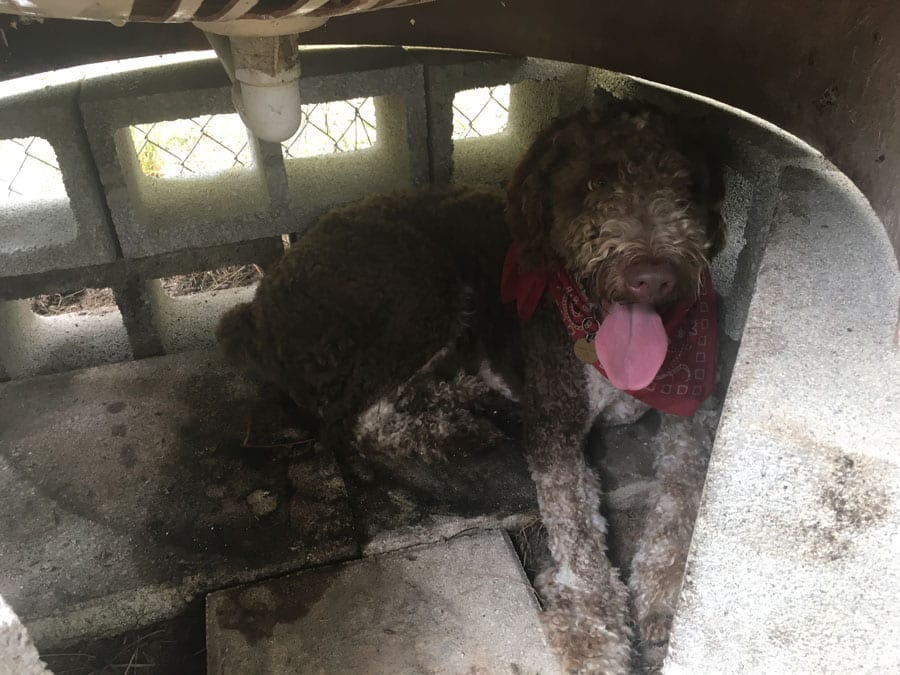
After 3 months the cardboard will become soggy and I can then scrap it. The weight of the soil will hold it in place unless I drag the rake in the slots I made. It also makes a great dog house.
We used these items
We like them and would recommend them to you for this project
As an Amazon Associate I earn from qualifying purchases.
This cost is not added to your purchase, it is a percentage from Amazon for bringing people to their website for the transaction.
This cost is not added to your purchase, it is a percentage from Amazon for bringing people to their website for the transaction.